plushies
lesson plan by learning coordinator betsey gravatt
Make your very own plushie or pillow with this super simple and fun method!
ages 12 and up
materials:
Fabric of your choice
Scissors
Thread
Needle
Stuffing of your choice (batting, cotton balls, scraps of paper, shredded newspaper, etc)
Fabric markers (optional)
Pins (optional)
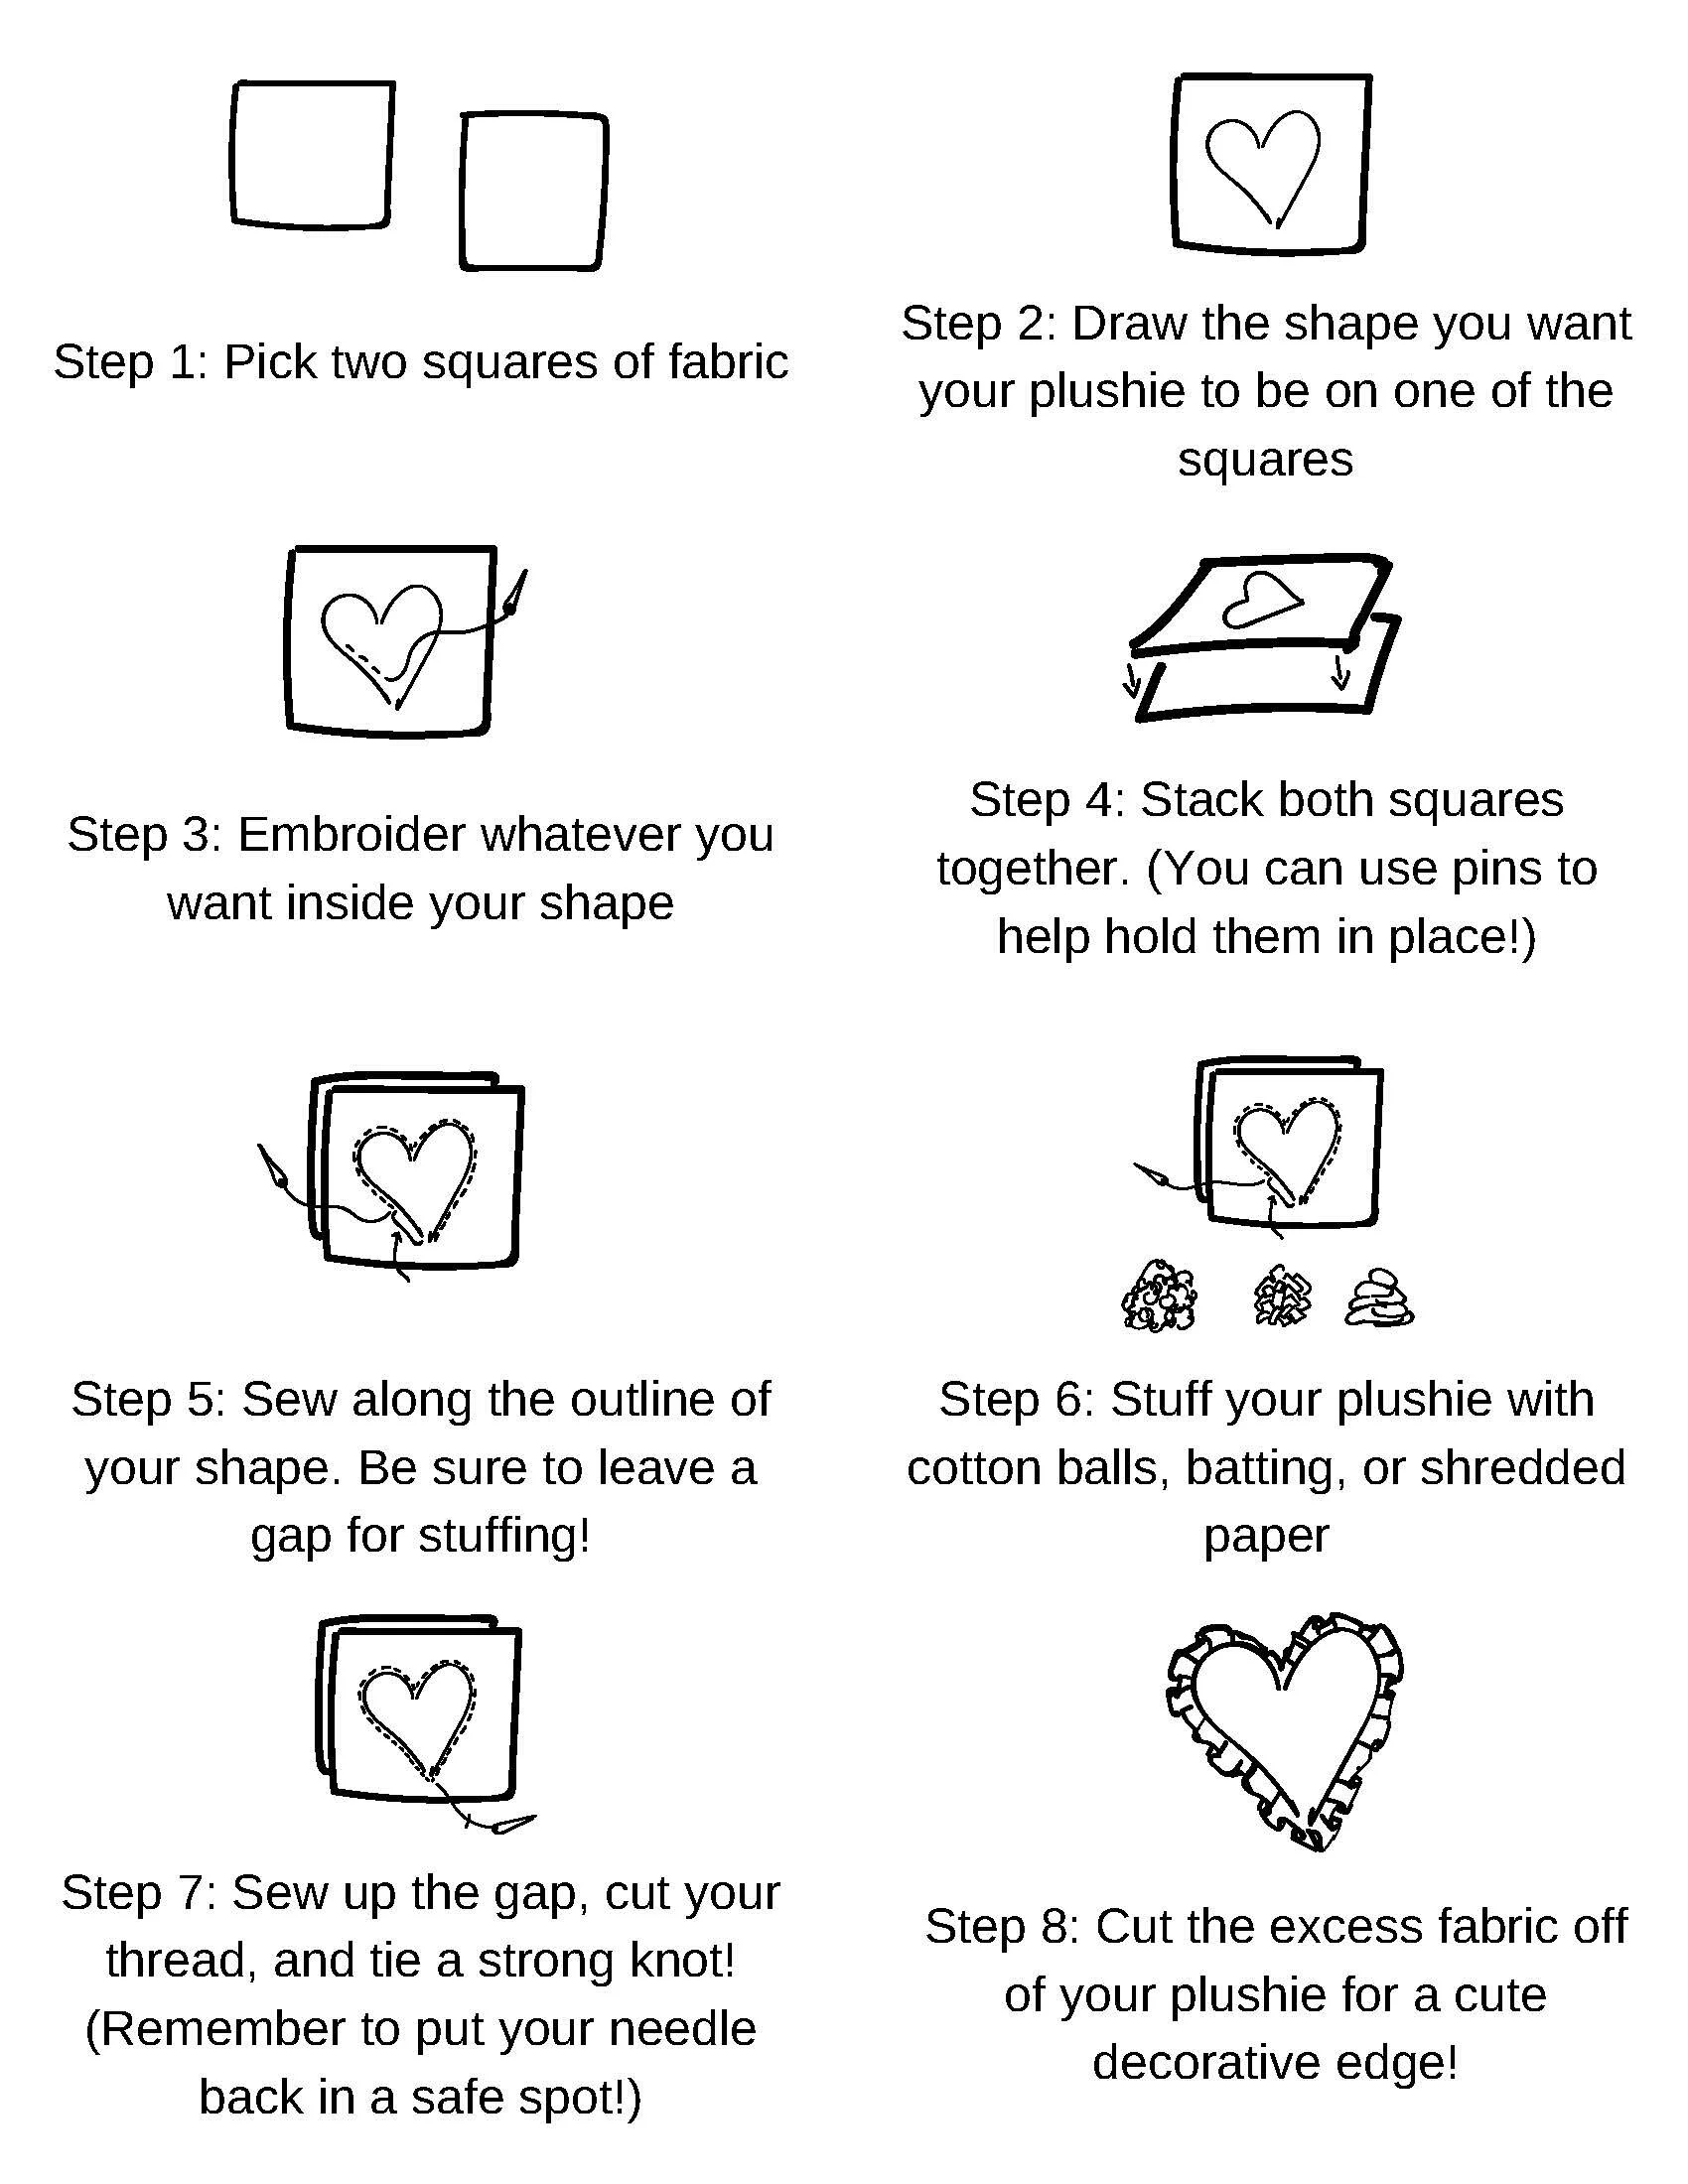
steps: (refer to the diagram below!)
Cut out 2 squares of fabric, close in size to one another.
Draw the outline of your plushie on one of the squares. (You can freehand this shape, or find a pre-drawn template to use as a guide)
Before beginning to assemble your plushie, you can embroider whatever you would like inside your drawn outline, leave it plain, or draw on your plushie with fabric markers.
Stack both squares together. (You can use pins to help hold the squares in place while you are sewing)
Sew the two squares together along your drawn outline. Remember to leave a small opening for stuffing!
Fill plushie with your choice of stuffing.
Close up the gap, cut your thread, and tie a strong knot. Remember to put your needle back in a safe spot!
Cut the excess fabric from around your plushie for a cute decorative edge.